Creating and Assigning Game Categories
Synthesis VR game categories allow you to choose which games are available for customers to choose from. They also can act as filters as you will see below. By default Synthesis VR will include all downloaded games as available game options during sessions. Once a game category is setup and assigned, only those games will be available.
To create a game category navigate to Administration>> Games & Licensing >> and select Game Categories.
![]()
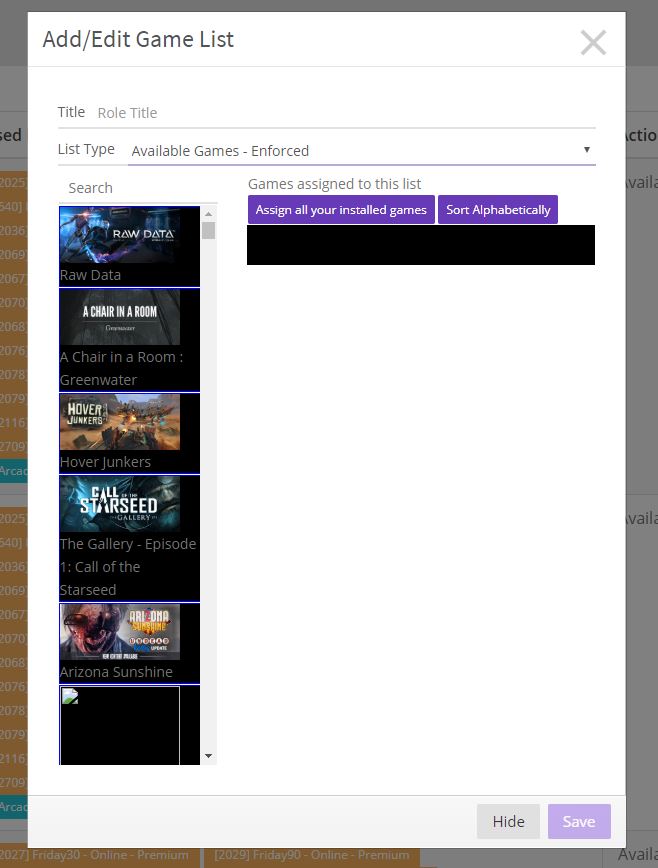
From here select the + sign in the top corner to add a new game category.
From this screen you give the game library a name and select which games you would like to include.
The game repository on the left is fully searchable and contains a master list off all games known to synthesis vr. Search the game that you would like to add and drag it over to the assigned list to the right adding each one. If a game is not in the list,you can add it here. Please note that you are not licensing games here but creating a game list of games you already have. Once all your games are added you can click save
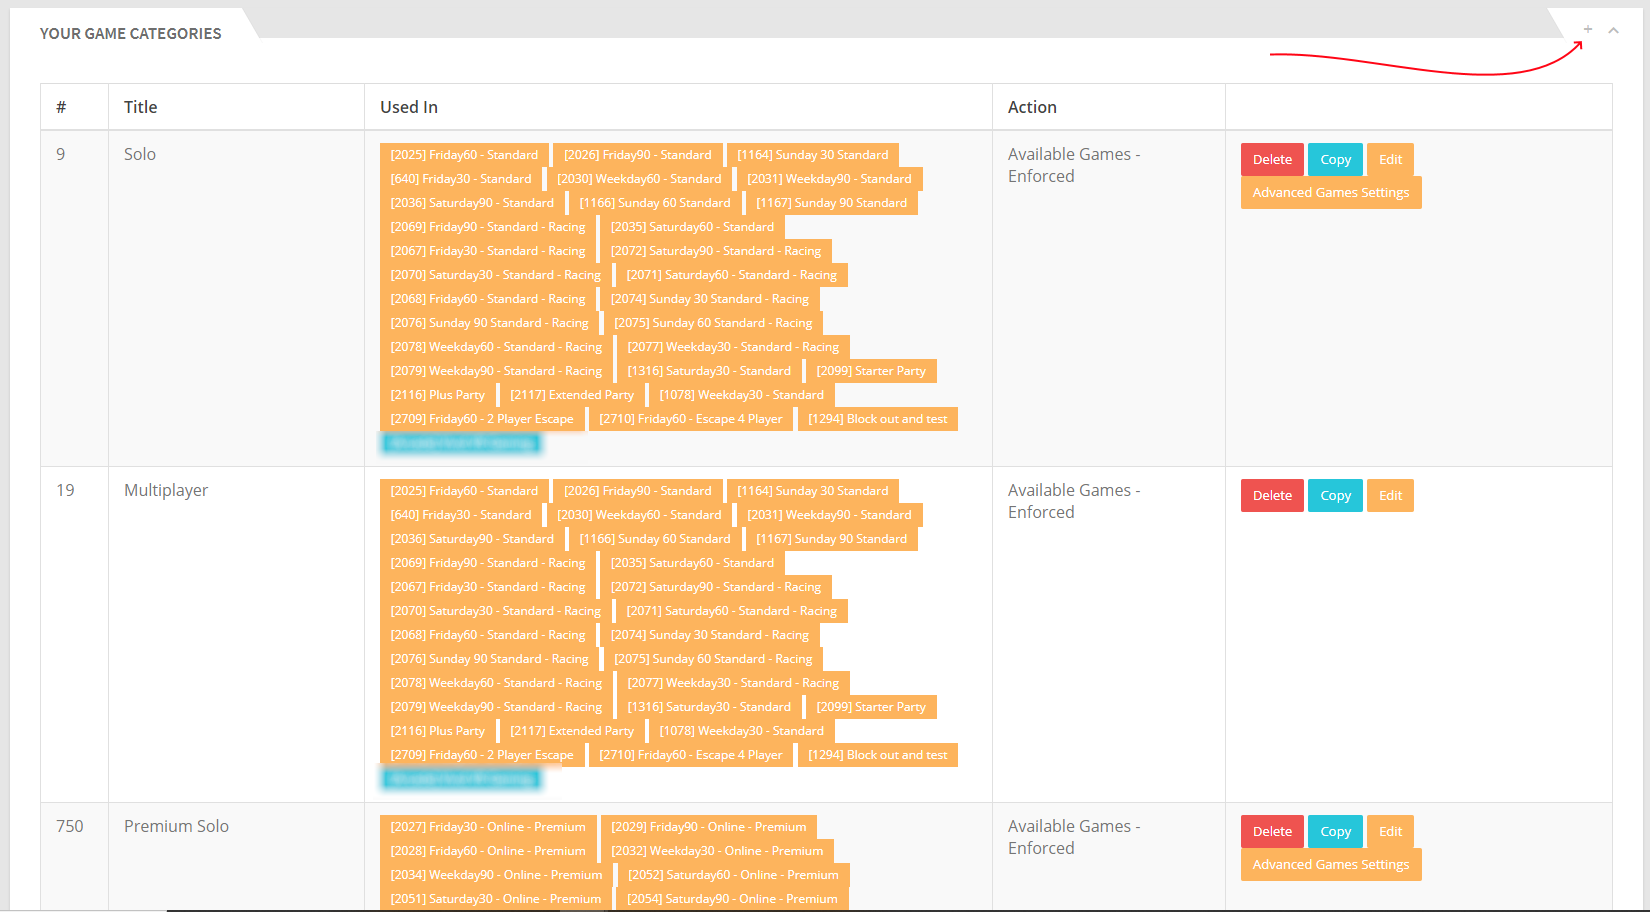
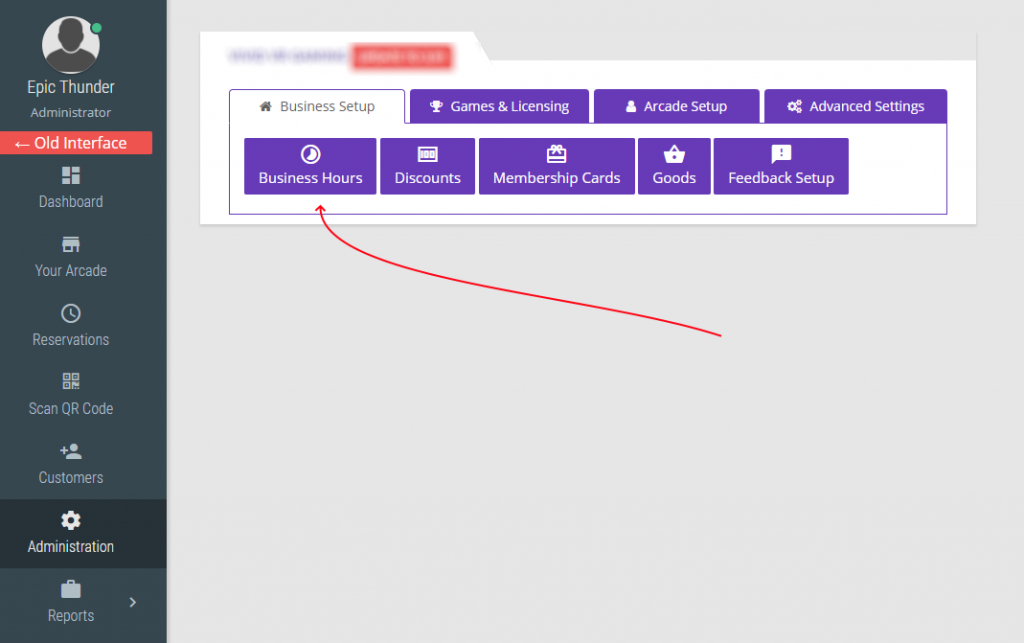
Refreshing the game category page, you will now see your new game category in the list. Notice that the “used In” column is empty. This is because we need to assign the game category to working business rules and allow it to show up during a session.To assign a game category to working business rules navigate to Administration>>Business Hours.
Click on edit for the work hour rule you would like to assign the game category to.
![]()
Click on the Games tab, and press the Assign Game Categories+ option. A new entry will populate. Use the drop down menu to select your new game category and press save.
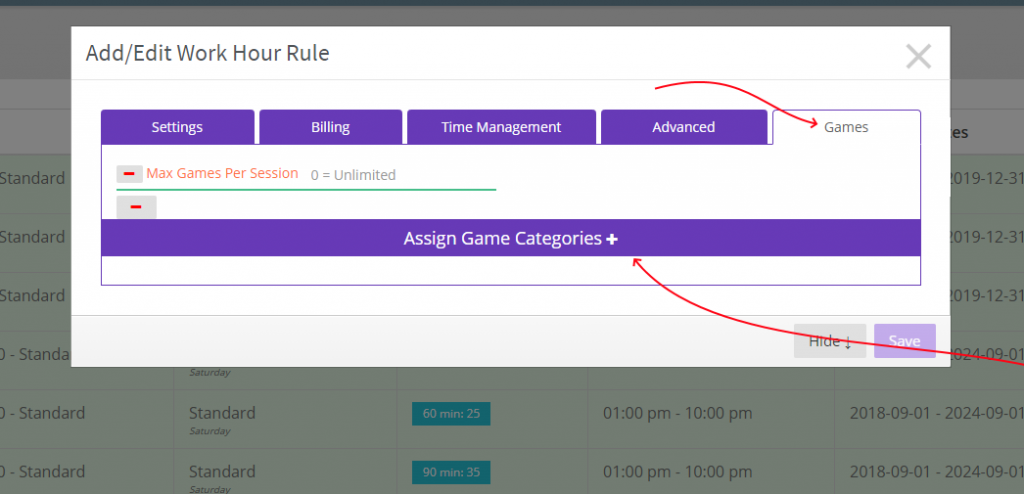
Your game category will now be available for the hours and experience of that work rule. You may assign multiple game categories to work rules. This allows you to create filters for your customers. For example you can create a single player category and a multiplayer category, and assign them both to the work rule. Your customer will then see a tab for each category, giving them a filter between single and multiplayer. Since work hours can be separated by experiences, you can also have separate game categories for separate experiences.
To save time from having to add the game category to several work rules, you can bulk edit and add the category to every rule at once. To do so select the 3 dot menu in the right hand corner and select +Bulk Edit.
![]()
On the bulk edit screen, select the games tab and use the Assign Game Categories+ button to add your game category to all rules and press save.

Once a game category is created, you can add a new game by editing the game category, but you can also easily add the game to one or multiple categories.
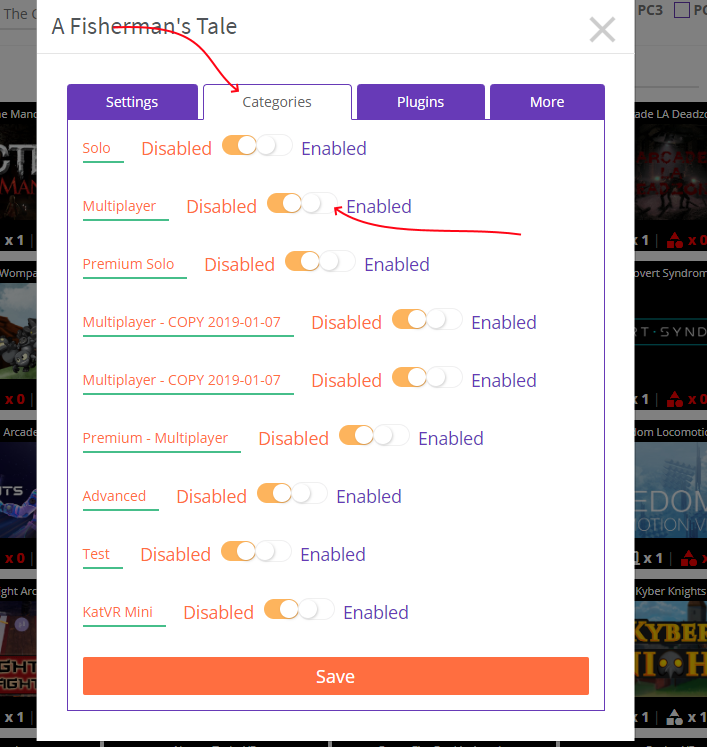
To do so navigate to Administration >> Games & Licensing >> and select Your Games.
![]()
From here, navigate down the page until you find the newly added game, and select it. Navigate to the Categories tab. From here you can add the game to any category by selecting the Enable toggle and press save.
Check out this webinar on the topic of game licensing and categories.