VR Stations
Before you can schedule or start a session, you’ll need to assign Experience types to your PC Stations using the following steps.
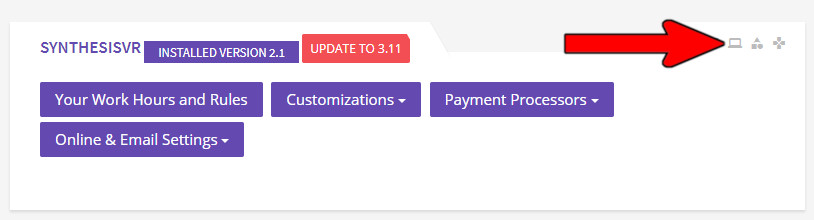
- From the Administration menu, click on the “VR Stations” button.
- If all your stations use the SynthesisVR overlay (as explained in the Experience Type manual located here: https://svr.li/experiences), then skip to Step 7.
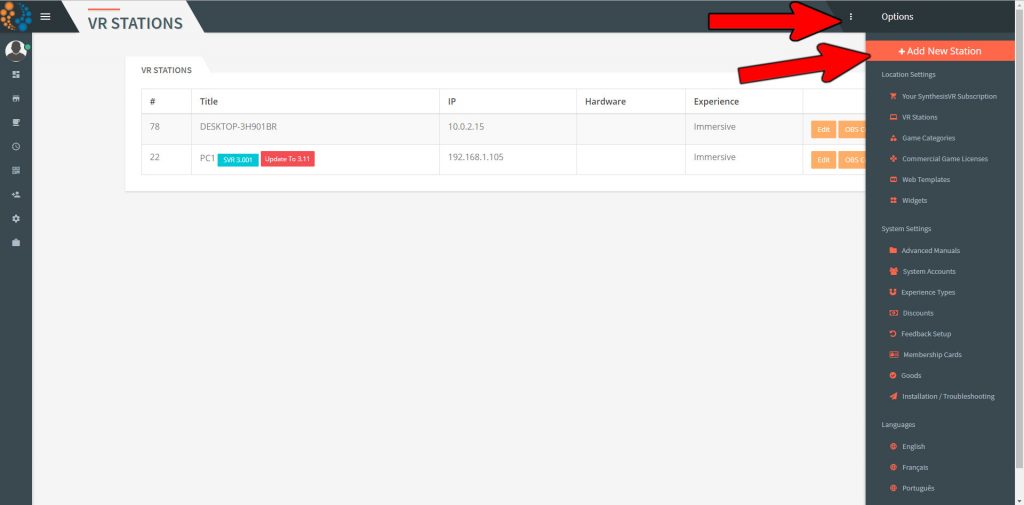
- Click on the 3 dots in the top right which will bring up your Option menu and then click on the “Add New Station” button.
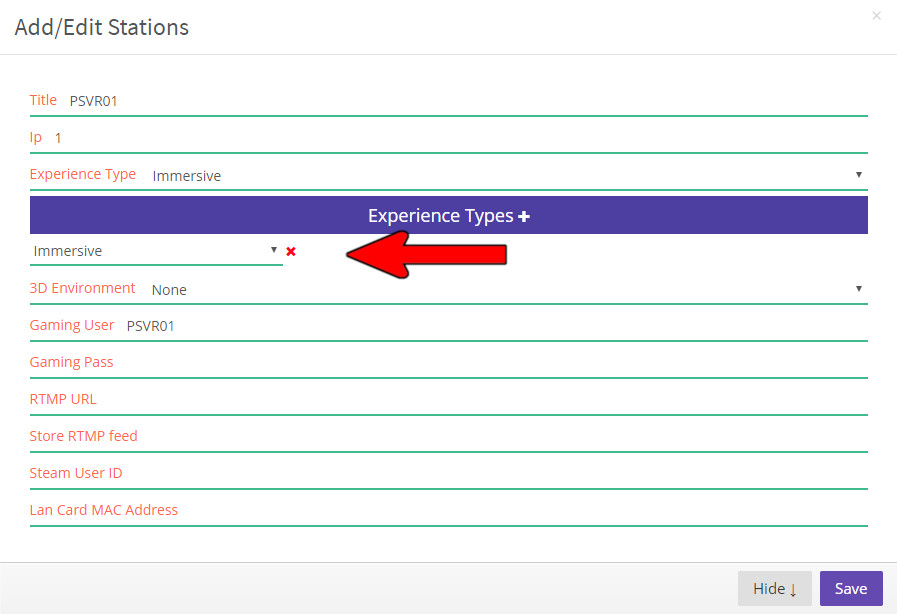
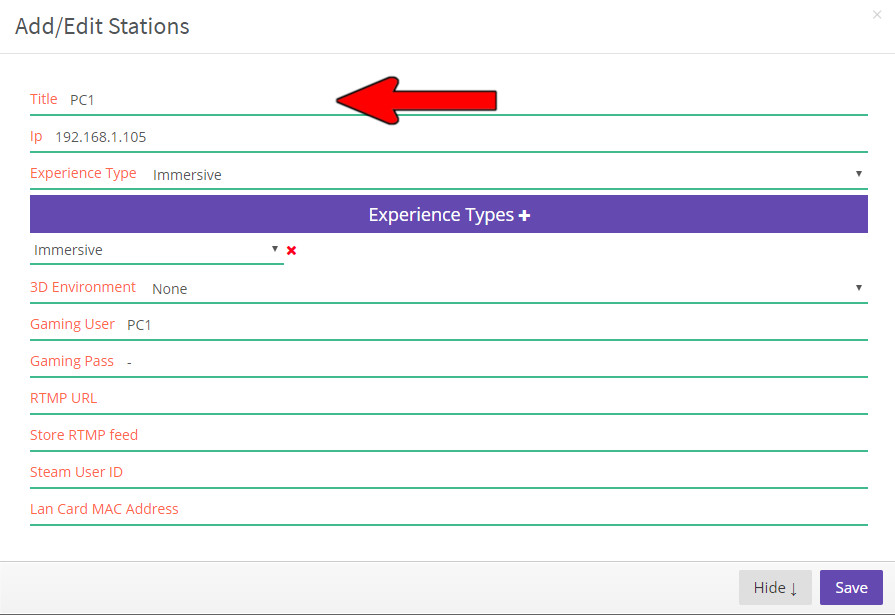
- Enter in the Station Name in the “Title” section (best practice is to number your stations for easy identification). Enter in an arbitrary number into the “IP” section (again, best practice and to keep things consistent, use a numerical value to help identify the station). Enter in a user name in the “Gaming User” section. Again, best practice is to use the same thing you entered into the “Title” section.

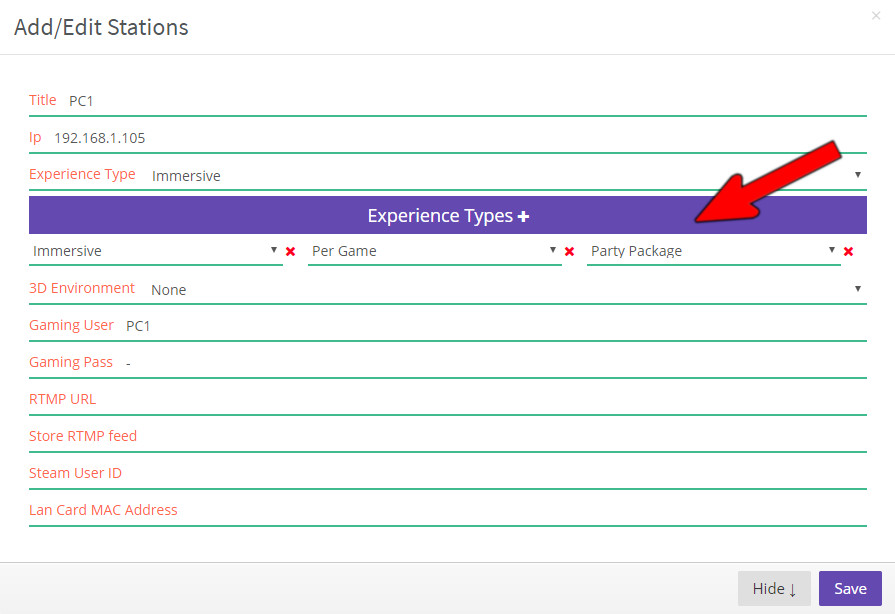
- You’ll need to have one Experience Type selected, so click on the “Experience Types +” button. You’ll need to choose the Experience Type from the drop down menu that is added that is set up as not using the SVR overlay (you can refer to those instructions in the Experience Type manula located here: https://svr.li/categories)
- Once you’ve entered in all the necessary (and optional) sections, you will see that the “Save” button is now solid and clickable. Click that to save, otherwise your edits will be lost. If you want to exit and start over click the tiny “x” button in the top right of the window or click the “Hide” button at the bottom of the window. If you do not have any additional VR Stations to set up, then you are done with this manual. If you have stations that are using the Experience Type overlay, please continue to step 8.
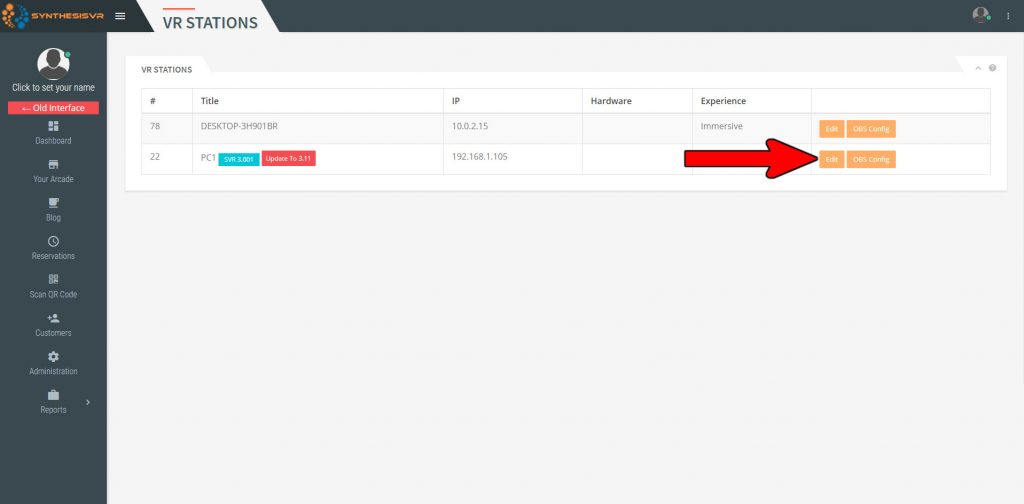
- If you’re VR Stations need to have the SynthesisVR overlay, you’ll want to be start (or continue) with this step. Click on the “Edit” button for the VR Station you need to make adjustments on. Note that the “OBS Config” button is explained (along with other settings) in the Video Capture manual found here: https://svr.li/videocapture
- If necessary, you can edit the name of the individual VR Station in the “Title” section. Best practice is to be sure to number your VR Stations to make it easier to identify them.
- Click on the “Experience Types +” button to add in which Experience Type(s) are to be used in this station. You can add more Experience Types by clicking the “Experience Types +” button as many times as you have Experience Types to be used in the VR Station. Use the drop down menu in each Experience Type to choose the ones to be used in this VR Station.
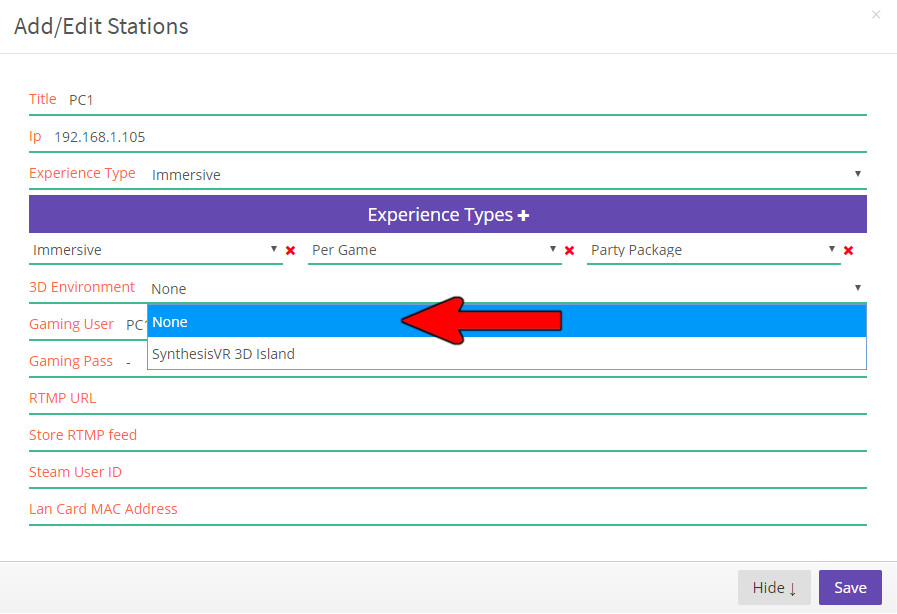
- If you’d like to use the 3D Environment, click the drop down menu in the “3D Environment” drop down menu and choose the “SynthesisVR 3D Island” option. You will need to do a refresh on the VR Station(s) that you’ll be using the 3D environment in. If you choose to revert back to the standard 2D menu, you can switch this back to “None” at any time and you’ll again need to do a refresh on the VR Station(s) that you’re reverting back.
- Once you’ve entered in all the necessary (and optional) sections, you will see that the “Save” button is now solid and clickable. Click that to save, otherwise your edits will be lost. If you want to exit and start over click the tiny “x” button in the top right of the window or click the “Hide” button at the bottom of the window.